Set up a remote runner
Remote runners are complete and supported for evaluation. Settings, file names and the daemon's packaging may still change before general availability.
Set up a remote runner to let an existing OpsChain instance run changes on a host inside your network. The daemon on that host only ever connects outbound to OpsChain, so nothing in your network has to accept a connection from it.
Two people are usually involved, and this guide marks which steps belong to each:
- The OpsChain administrator creates the remote runner target in OpsChain. They need permission to manage targets: a superuser for a target that serves the whole instance, or Update on
<node path>/remote_runner_targetsfor one owned by a project, environment or asset (see who can manage targets). - The host administrator installs and runs the daemon on a host in your network. They never need access to OpsChain's own cluster.
Choose a packaging mode
Both modes run the same daemon and behave the same once installed. They differ in what you install and what it needs:
| Simple mode | Advanced mode | |
|---|---|---|
| What you install | One disk image and one system service | RHEL packages, then a small daemon archive in an ordinary account |
| How it runs | A systemd-nspawn system service | A systemd user service in that account |
| Root needed | To install, run and upgrade it | Only to install the packages, create the account and enable lingering |
| Runtime dependencies | Inside the image | Your own RHEL 9 packages, installed with dnf |
| Visible to your CVE scanning | No, the image is opaque | Yes, and patched by your own dnf update |
Choose simple mode when you want the fewest moving parts and can run a root service: everything the daemon needs comes in one image, and the host needs only systemd-nspawn.
Choose advanced mode when your policy does not allow a root-run service, or your security team needs every component the runner relies on to be visible to its package manager and scanning. It takes more setup, but once installed nothing in the runner's lifecycle needs root.
Prerequisites
For both modes:
- A host running RHEL 9 or a compatible distribution (AlmaLinux, Rocky Linux, Oracle Linux).
- Outbound HTTPS from the host to the OpsChain API's host and port, directly or through a proxy. The daemon pulls runner images through the same host, so nothing else in OpsChain needs to be reachable.
/dev/net/tun, which RHEL 9 provides by default, so each container can be given its own network.- Network access from the host to whatever the changes it runs will manage.
- Disk space for the runner images the daemon caches. By default the cache may grow to 20 GiB.
Simple mode also needs root on the host, the systemd-container package (for systemd-nspawn), systemd-repart, and the DockerHub credentials provided with your OpsChain licence. Advanced mode's requirements are listed in install advanced mode.
Create the target's key pair
Host administrator.
OpsChain encrypts every secret it sends to a target with that target's public key, so only the daemon holding the private key can read it. Create the key pair on the host, so the private key never leaves it:
umask 077
openssl genpkey -algorithm RSA -pkeyopt rsa_keygen_bits:3072 -out target.pem
openssl pkey -in target.pem -pubout -out target.pub.pem
Send target.pub.pem to the OpsChain administrator. Keep target.pem on the host; you install it with the daemon.
Create the target in OpsChain
OpsChain administrator.
-
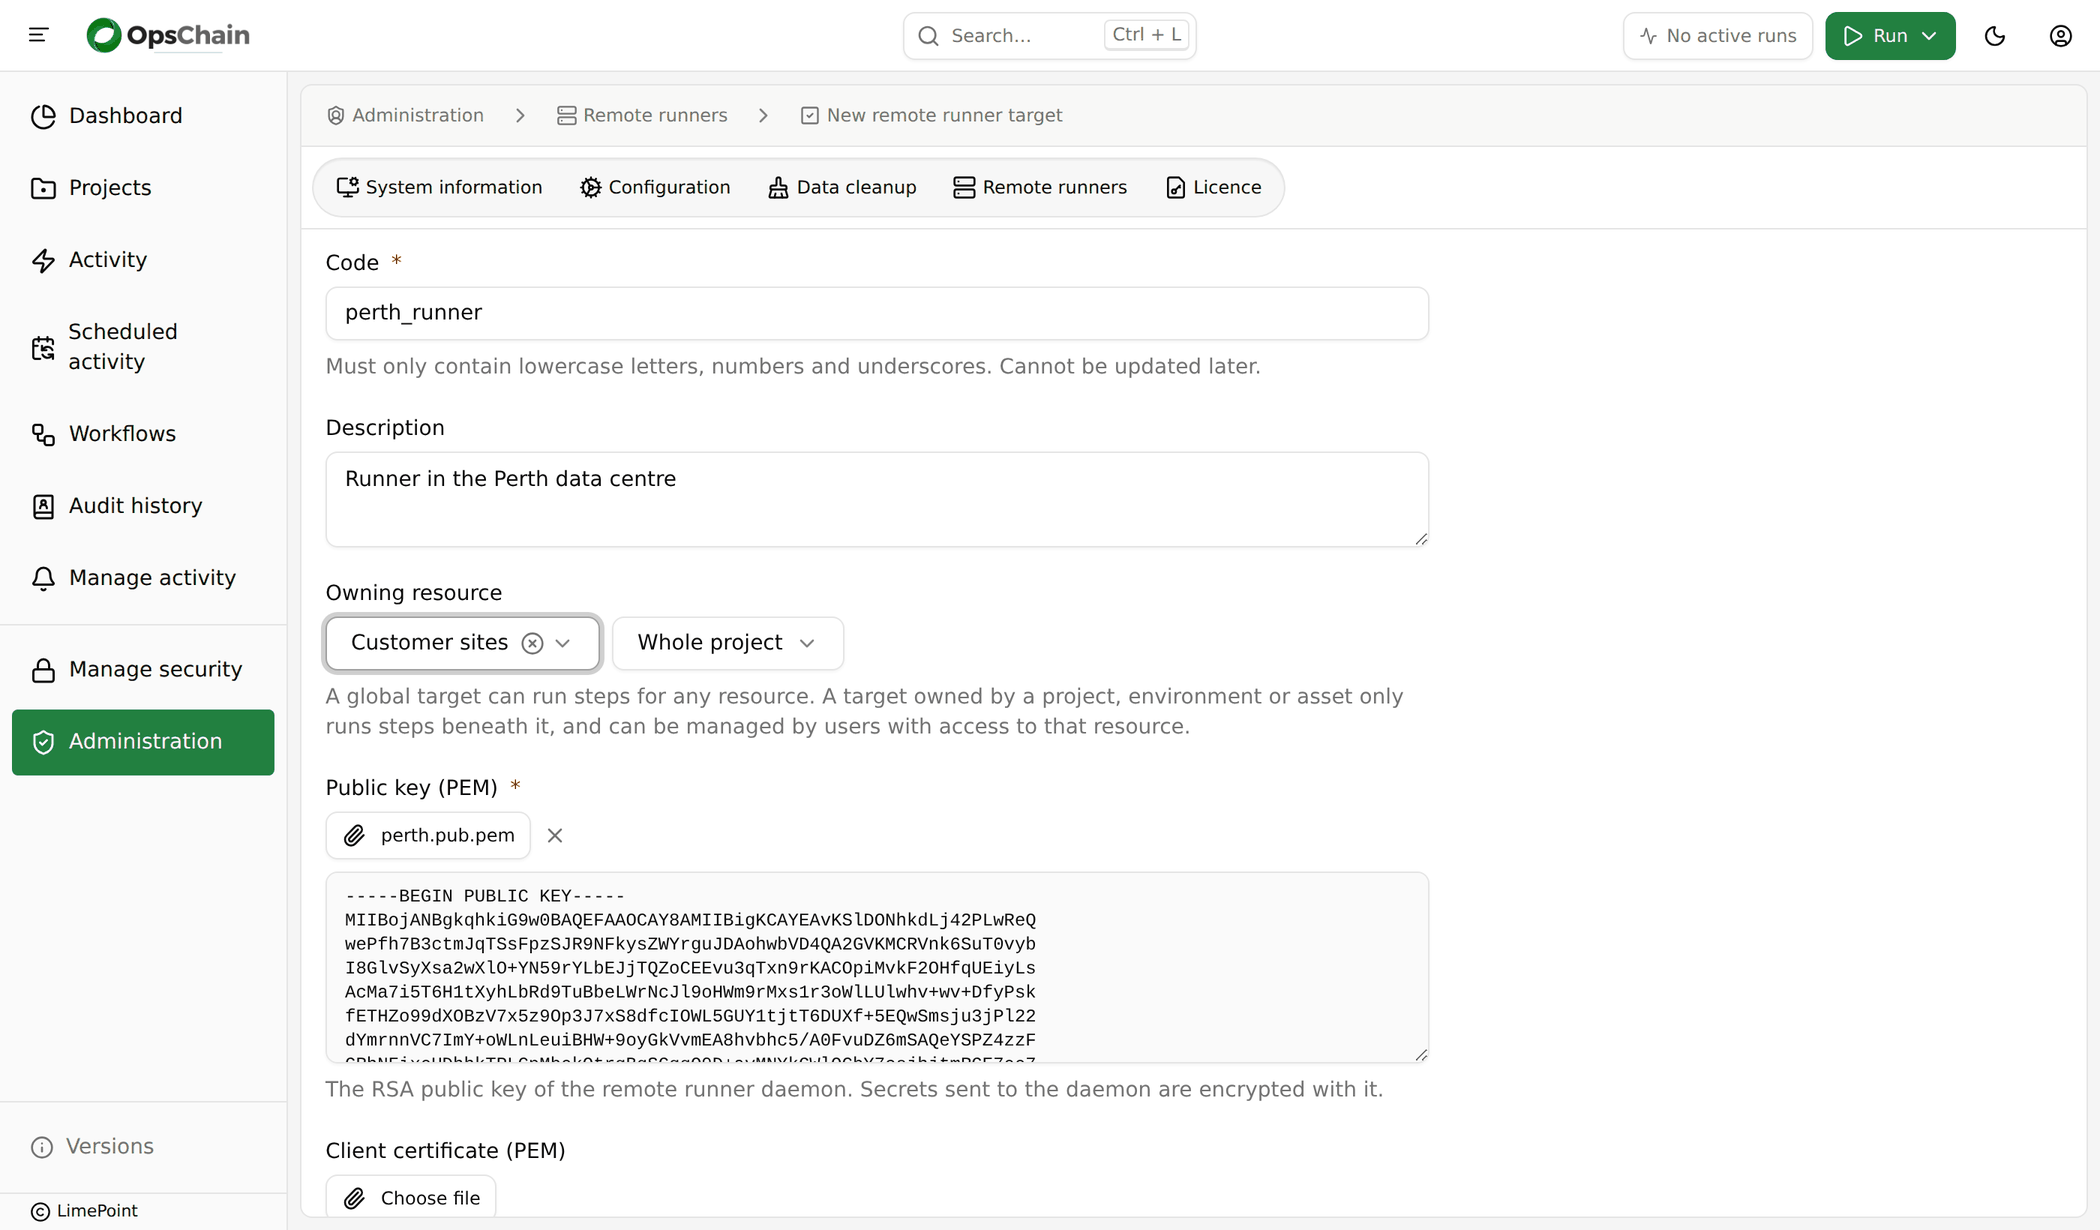
In the OpsChain GUI, open Administration > Remote runners and click Add remote runner target:
-
Fill in the form:
- Code is the target's unique code. It cannot be changed later.
- Owning resource is the project, environment or asset whose changes the target runs. Leave it as Global (no owning resource) only if every change in the instance should run remotely. See which changes run remotely.
- Public key (PEM) is the host administrator's
target.pub.pem. Choose the file or paste its contents.
-
Click Add remote runner target at the bottom of the form. OpsChain shows the daemon's bearer token:
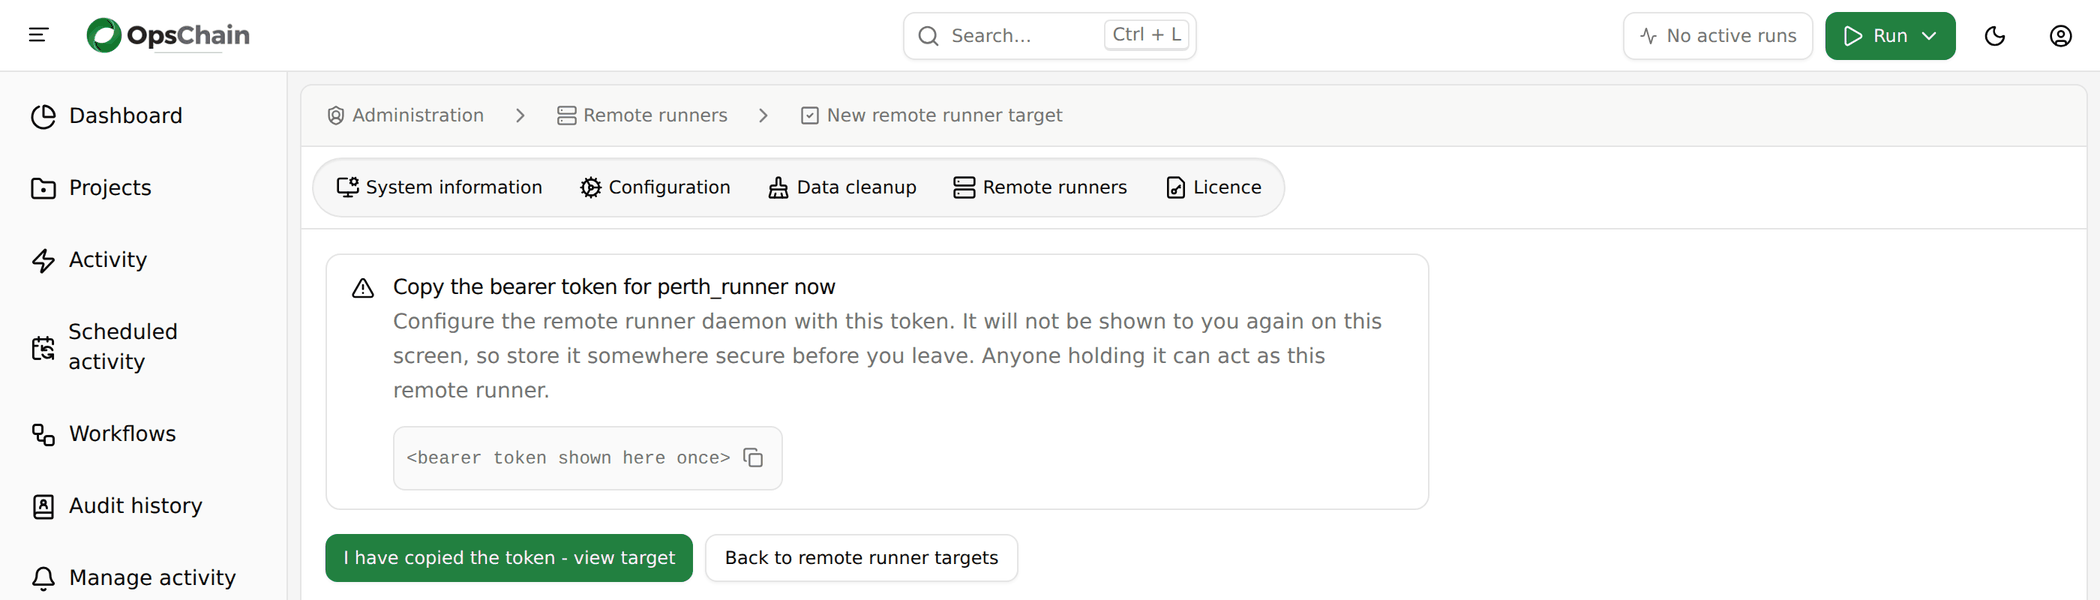
The token is only shown on this screen. Copy it before leaving the page. If it is lost, delete the target and create a new one.
-
Click I have copied the token - view target. The target's ID is the last part of the address of its page,
/admin/remote_runner_targets/<target id>.
Send the host administrator the OpsChain URL, the target's ID and its token, over a channel you would trust with a password. The token lets its holder act as this remote runner.
The new target shows Never connected until its daemon starts. Targets can also be created through the remote runner targets API: the token is returned only by the create request, in data.meta.bearer_token.
Install simple mode
Host administrator. Run these steps as root, or with sudo.
Simple mode runs the daemon inside a disk image with systemd-nspawn, as a system service. The image contains the daemon, its Ruby runtime and every tool it uses (crun, skopeo, slirp4netns, git, zstd).
Build the disk image
The simple-mode image is published as limepoint/opschain-remote-runner-simple-mode-content, tagged with the OpsChain version it was built with. Use the tag for your OpsChain instance's version.
Turn it into a disk image with systemd-repart. These commands use Podman to pull and mount the image; any tool that gives you the image's filesystem as a directory, with ownership and file capabilities intact, will do:
version=<OpsChain version>
image=docker.io/limepoint/opschain-remote-runner-simple-mode-content:${version}

podman login docker.io
podman pull "${image}"
content_dir="$(podman image mount "${image}")"

mkdir -p /opt/opschain-remote-runner-image/repart.d
cat > /opt/opschain-remote-runner-image/repart.d/10-root.conf <<CONF
[Partition]
Type=root
Format=ext4
CopyFiles=${content_dir}:/
CONF

systemd-repart --empty=create --size=2G \
  --definitions=/opt/opschain-remote-runner-image/repart.d \
  /opt/opschain-remote-runner-image/simple-mode.raw

podman image unmount "${image}"
Configure the daemon
The container runs under a fixed, unprivileged range of host user IDs: user 0 inside it is host UID 524288, and the daemon runs inside it as UID 10001, which is host UID 534289. The configuration and state directories are bind mounted into the container, so create them with matching owners, and install the private key:
install -d -m 0755 /etc/opschain-remote-runner
install -d -o 534289 -g 534289 -m 0700 \
  /var/lib/opschain-remote-runner/sockets /var/lib/opschain-remote-runner/state
install -o 534289 -g 534289 -m 0600 target.pem /etc/opschain-remote-runner/target.pem
Create /etc/opschain-remote-runner/env, owned by UID 524288 with mode 0600, with the details the OpsChain administrator sent:
OPSCHAIN_SAAS_URL=https://opschain.example.com
OPSCHAIN_TARGET_ID=<target id>
OPSCHAIN_TARGET_TOKEN=<bearer token>
OPSCHAIN_TARGET_PRIVATE_KEY=/etc/opschain-remote-runner/target.pem
OPSCHAIN_SOCKET_DIR=/var/lib/opschain-remote-runner/sockets
OPSCHAIN_STATE_DIR=/var/lib/opschain-remote-runner/state
XDG_RUNTIME_DIR=/var/lib/opschain-remote-runner/state
chown 524288:524288 /etc/opschain-remote-runner/env
chmod 0600 /etc/opschain-remote-runner/env
OPSCHAIN_SAAS_URL is the address of your OpsChain instance, without the /api suffix. See daemon configuration for the optional settings, including a proxy.
Install and start the service
Download the service's unit file to /etc/systemd/system/opschain-remote-runner.service:
curl -fsSLo /etc/systemd/system/opschain-remote-runner.service \
  https://docs.opschain.io/files/downloads/opschain-remote-runner.service
If the host cannot reach the internet, download opschain-remote-runner.service on a workstation and copy it to that path with scp.
It runs the daemon's image with systemd-nspawn:
[Service]
Delegate=yes
ExecStart=systemd-nspawn --quiet --keep-unit --kill-signal=SIGTERM --register=no --private-users=524288:65536 --private-users-ownership=map \
  --bind=/etc/opschain-remote-runner --bind=/var/lib/opschain-remote-runner --bind=/dev/net/tun \
  --image=/opt/opschain-remote-runner-image/simple-mode.raw --chdir=/opt/opschain-remote-runner/daemon -- /bin/bash /root_wrapper.sh
--private-users-ownership=map needs systemd 252 or later, which RHEL 9 has. On an older systemd, change it to --private-users-ownership=chown.
Enable and start the service:
systemctl daemon-reload
systemctl enable --now opschain-remote-runner
Then check the target is live.
Install advanced mode
Advanced mode installs the daemon into an ordinary account and runs it as a systemd user service. Ruby and every tool the daemon uses come from your RHEL 9 repositories; the daemon's own code comes in a small archive downloaded from your OpsChain instance. The archive contains only the daemon, three pure-Ruby gems it uses (base64, logger and webrick, with their licences), a launcher, a preflight script, the systemd user unit and an example configuration file. It contains no Ruby runtime, no container tools and no compiled code.
Prepare the host
Host administrator, as root. These are the only steps that need root.
-
The daemon needs Ruby 3.3, from the
ruby:3.3module stream; the defaultrubystream on RHEL 9 is older. Install it and the tools the daemon uses:sudo dnf module enable ruby:3.3sudo dnf install ruby rubygem-json crun skopeo slirp4netns git-core zstdThe daemon runs
/usr/bin/ruby, so a Ruby installed elsewhere, by a version manager for example, is not used.shadow-utilsandutil-linux, which every RHEL 9 installation has, providenewuidmap,newgidmap,unshareandnsenter. -
Choose the ordinary account the runner runs as. It needs no group memberships and no
sudorights. These examples useopschain-runner. -
The account needs a range of subordinate user and group IDs to map the containers' users into. On RHEL 9,
useraddadds one automatically. Check with:grep "^opschain-runner:" /etc/subuid /etc/subgidIf either file has no entry for the account, add one, choosing a range no other account uses:
sudo usermod --add-subuids 200000-265535 --add-subgids 200000-265535 opschain-runner -
Enable lingering, so the account's systemd user manager, and the runner with it, starts at boot and keeps running when nobody is logged in:
sudo loginctl enable-linger opschain-runner
Unprivileged user namespaces must be enabled (user.max_user_namespaces greater than zero), which is the RHEL 9 default.
Install the daemon
Host administrator, as the runner account. Log in to the account directly, for example over SSH, rather than switching to it with su or sudo, so systemctl --user can reach its user manager.
-
Create the runner's directories and move the private key into place:
mkdir -p ~/opschain-remote-runner/releases ~/opschain-remote-runner/config ~/opschain-remote-runner/stateinstall -m 0600 target.pem ~/opschain-remote-runner/config/target.pem -
Download the daemon archive from your OpsChain instance. This needs an OpsChain API token for a user who can view the target; ask the OpsChain administrator for one if you have no OpsChain login.
cd ~curl -fsS -OJ -D archive-headers.txt "https://opschain.example.com/api/remote_runner_targets/<target id>/daemon_archive" \-H "Authorization: Bearer <api token>"-Jsaves the file under the name OpsChain gives it,opschain-remote-runner-<version>.tar.gz. Check it against the SHA-256 in the response'sX-Checksum-Sha256header:grep -i '^x-checksum-sha256:' archive-headers.txtsha256sum opschain-remote-runner-<version>.tar.gzA
404titledRemote runner archive not bundledmeans your OpsChain build does not include the archive; contact LimePoint support. -
Extract it and point
currentat it:tar -xzf opschain-remote-runner-<version>.tar.gz -C ~/opschain-remote-runner/releasesln -sfn releases/opschain-remote-runner-<version> ~/opschain-remote-runner/currentrm archive-headers.txt opschain-remote-runner-<version>.tar.gzEach release lives in its own directory under
releases, which makes an upgrade a symlink swap. -
Check the prerequisites:
~/opschain-remote-runner/current/bin/opschain-remote-runner-preflightIt reports the installed packages, whether
/usr/bin/rubyis Ruby 3.3, the account's subordinate ID ranges, lingering, user namespaces and/dev/net/tun, and exits non-zero when anything required is missing. -
Create
~/opschain-remote-runner/config/env, with mode0600, with the details the OpsChain administrator sent:OPSCHAIN_SAAS_URL=https://opschain.example.comOPSCHAIN_TARGET_ID=<target id>OPSCHAIN_TARGET_TOKEN=<bearer token>The release's
share/env.exampleis a starting point. The unit sets the rest: the state directory, the private key's path and the directory for each container's socket. See daemon configuration for the optional settings, including a proxy. -
Install and start the user service:
mkdir -p ~/.config/systemd/usercp ~/opschain-remote-runner/current/share/systemd/opschain-remote-runner.service ~/.config/systemd/user/systemctl --user daemon-reloadsystemctl --user enable --now opschain-remote-runner
Daemon configuration
Both modes read the same optional settings from the daemon's env file:
| Variable | Purpose |
|---|---|
HTTPS_PROXY, HTTP_PROXY, NO_PROXY | The proxy the daemon uses to reach OpsChain, also passed into every container. Use a proxy on a non-loopback address. See network access and proxies. |
OPSCHAIN_NETWORK | slirp4netns (the default) gives each container outbound network access. none gives it none, leaving only its connection to OpsChain through the daemon. |
OPSCHAIN_IMAGE_CACHE_BUDGET_BYTES | How large the runner image cache may grow before the least recently used images are removed. Defaults to 20 GiB. |
OPSCHAIN_LOG_DISK_CAP_BYTES | How much output the daemon holds for each piece of work while it cannot reach OpsChain, before dropping the oldest. Defaults to 100 MiB. |
How much work a target runs at once, and how often it polls, are set on the target in OpsChain, not in this file. See concurrency and polling.
Restart the service after changing the file.
Check the target is live and run a change
- In Administration > Remote runners, the target shows Live within a few seconds of the service starting. If it stays Never connected, see troubleshooting.
- Run a change on a node the target serves. The change runs as usual, and the target's claim is recorded as an
info:remote_runner_assignment:claimedevent on the change, naming the target.
From then on, every change on the nodes the target serves runs on this host.
Upgrade the runner
A daemon keeps working when OpsChain is upgraded, until a release changes the daemon protocol version. Its changelog says when it does; see daemon compatibility. Upgrade the runner then, or whenever you want a newer daemon.
Stopping the daemon while it is preparing work loses that work, so drain the target first:
- OpsChain administrator. Turn on maintenance mode for the target, and wait until it shows Drained.
- Host administrator. Replace the daemon:
-
Simple mode: stop the service (
systemctl stop opschain-remote-runner), build the disk image again from the image tag for your OpsChain version, replacingsimple-mode.raw, and start the service. Keep/var/lib/opschain-remote-runner, which holds the daemon's current token. -
Advanced mode: download the archive again, then switch to it:
tar -xzf opschain-remote-runner-<new version>.tar.gz -C ~/opschain-remote-runner/releasesln -sfn releases/opschain-remote-runner-<new version> ~/opschain-remote-runner/currentcp ~/opschain-remote-runner/current/share/systemd/opschain-remote-runner.service ~/.config/systemd/user/systemctl --user daemon-reloadsystemctl --user restart opschain-remote-runnerKeep the old release in
releasesuntil the new one is working: switchingcurrentback and restarting is the rollback.
-
- OpsChain administrator. Turn maintenance mode off.
Remove the runner
- OpsChain administrator. Turn on maintenance mode for the target and wait until it shows Drained.
- Host administrator. Stop and remove the daemon:
-
Simple mode:
systemctl disable --now opschain-remote-runnerrm /etc/systemd/system/opschain-remote-runner.servicesystemctl daemon-reloadrm -rf /opt/opschain-remote-runner-image /etc/opschain-remote-runner /var/lib/opschain-remote-runner -
Advanced mode, as the runner account:
systemctl --user disable --now opschain-remote-runnerrm ~/.config/systemd/user/opschain-remote-runner.servicesystemctl --user daemon-reloadrm -rf ~/opschain-remote-runnerFiles inside a container belong to the account's subordinate IDs. The daemon removes them when work finishes, but if work was interrupted,
rmmay reportPermission deniedunderstate/bundles. Start the runner again to let it clean up, or have an administrator remove the directory. An administrator can then disable lingering withsudo loginctl disable-linger opschain-runner.
-
- OpsChain administrator. Delete the target. Its token stops working once the target is deleted.
Advanced-mode troubleshooting
See also the troubleshooting that applies to both modes.
Start with the preflight script. ~/opschain-remote-runner/current/bin/opschain-remote-runner-preflight checks every host prerequisite.
journalctl --user prints No journal files were opened due to insufficient permissions. On a host whose journal is not persistent (no /var/log/journal directory), an ordinary account cannot read its own journal. Ask an administrator to make it persistent (sudo mkdir -p /var/log/journal && sudo systemctl restart systemd-journald), or to read it with sudo journalctl _UID=$(id -u opschain-runner).
newuidmap failed or uid range not allowed in a step's log. The account has no subordinate ID range, or the range does not match /etc/subuid and /etc/subgid. See prepare the host.
The runner stops when you log out. Lingering is not enabled for the account. loginctl show-user opschain-runner --property=Linger must report Linger=yes.
Looking at containers. The daemon runs crun as the runner account, so crun list, run as that account, lists its containers.